This is a sister post to installing hdp 2.2 with ambari 2.0 (moving to the azure cloud), but this time using AWS' EC2 IaaS servers. Just like with Azure having options such as HDInsight, AWS offers EMR for an easy to deploy Hadoop option. This post is focused on using another Cloud provider's IaaS offering to help someone who is planning on deploying the full HDP stack (in the cloud or on-prem), so I'll focus on using AWS' EC2 offering.
Like with the Azure cluster build-out, I'm going to violate my own a robust set of hadoop master nodes (it is hard to swing it with two machines) advice and create a cluster across three nodes with all three being masters AND workers. I repeat, this approach is NOT what I'd recommend for any "real" cluster. I am mainly thinking of the costs I'm about to incur and this setup will still provide much, much more storage & compute abilities than I could ever get running a cluster VirtualBox VMs on my mac. That out of the way, let's get rolling!
First up is to log into https://aws.amazon.com/. If you don't have an account already, check to see if Amazon is offering some free services (hey, nothing wrong with getting something for free!). Once logged in, go to the EC2 Dashboard; one way to get there from the main AWS page is to select Services >> EC2. You should see something like the following.
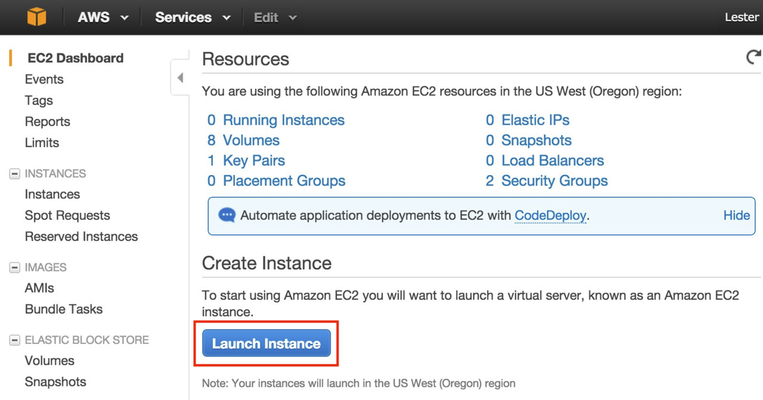
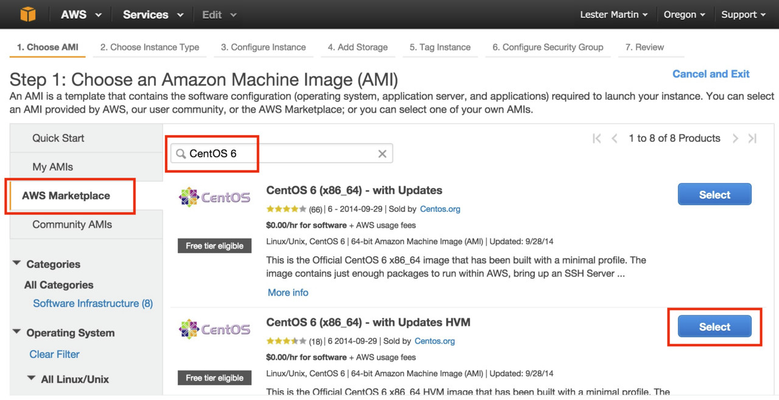
Let's run some CentOS 6.x servers since HDP 2.2 supported OS list does not cover CentOS 7. To get started, click on the Launch Instance button above. Then select AWS Marketplace and type in "CentOS 6" in the search box and press <Enter>. You can then click the Select button as shown below.
For my cluster, I went with the "d2.xlarge" instance types as it'll give me a few disks per node as well as enough CPU cores and memory to set up a simple cluster.
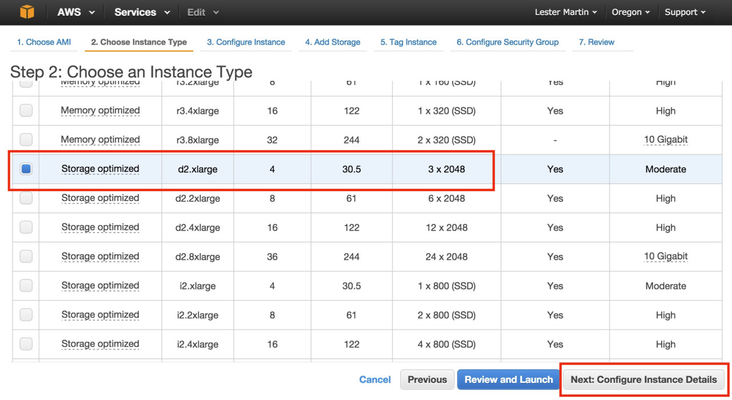
Be sure to click on Next: Configure Instance Details to set up the disks the way we need them to be and NOT on Review and Launch. On the Step 3 screen, I entered "3" in the Number of instances text box (i.e. I want 3 servers) and clicked on Next: Add Storage. On the Step 4 screen, as shown below, toggle the three Type column pulldowns from "Instance Store N" to "EBS", enter "1024" for the Size column, choose "SSD" for the Volume Type and select the Delete on Termination checkbox for all four storage devices before clicking on Next: Tag Instance.
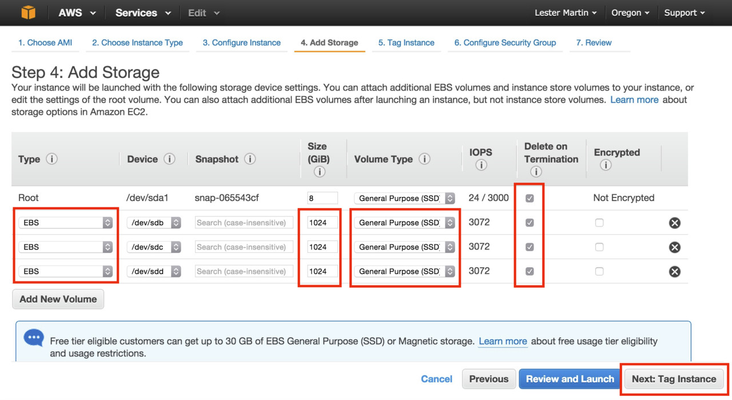
BTW, yes, 8GB is woefully small for a root file system on a host running HDP, but it'll do for the exercise of installing HDP. Visit these instructions for how to change it after creation. On the Step 5 screen, just select Next: Configure Security Group. On Step 6, select the "Create a new security group" radio button with the Assign a security group label and add something like "ec2testSecurityGroup" to Security group name before ignoring the IP address warning and clicking on Review and Launch.
After you perform a quick review on Step 7, click on the Launch button at the bottom of this screen. You'll then get prompted with the following lightbox where you can use a .pem file that you created before or build a new one. I chose to create a new one called "ec2test".
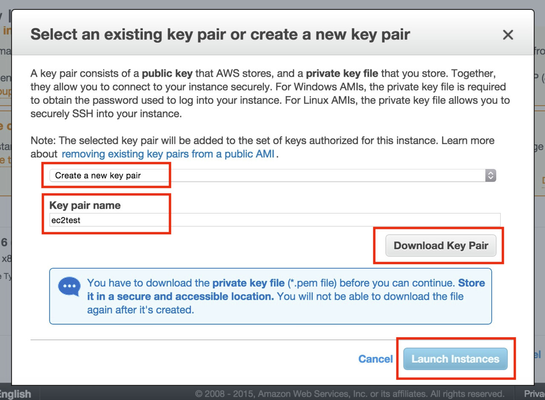
As indicated above, be sure to click on Download Key Pair and save this file as you'll need it later to SSH to the boxes. Then you can click on Launch Instances. You will then get some help finding these instances, but to help you find them later just use the Services >> EC2 navigation approach presented earlier. You should now see a 3 Running Instances link near the top of the page and clicking on that should show you something like the following (I went ahead and added some friendly identifies in the Name column, too).
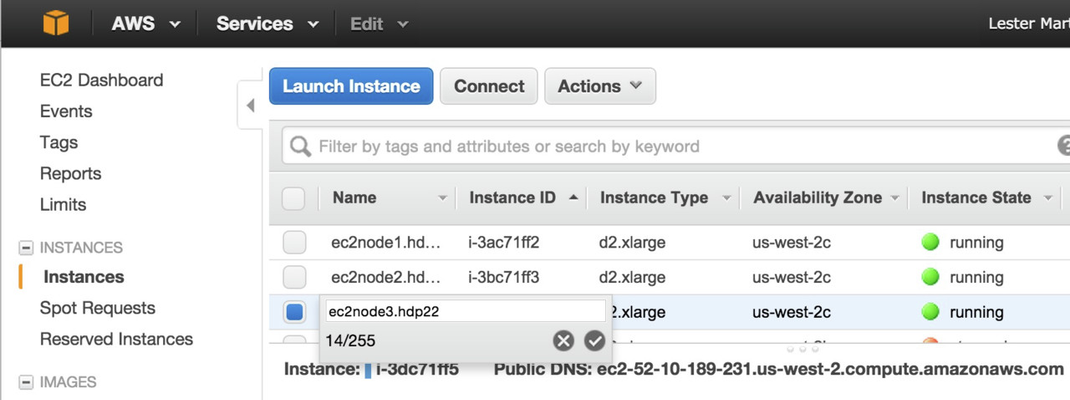
Now we should log into the boxes and make sure they are running. On the same screen as shown above, select the first instance ("ec2node2.hdp22" in my example) and click on the Connect button which will pop-up another lightbox telling you how to connect. Here's that in action on my mac.
HW10653:Amazon lmartin$ ls -l
total 8
-rw-r-----@ 1 lmartin  staff  1692 Jun 29 23:46 ec2test.pem
HW10653:Amazon lmartin$ chmod 400 ec2test.pem
HW10653:Amazon lmartin$ ssh -i ec2test.pem root@52.27.108.113
[root@ip-172-31-7-169 ~]# whoami
root
[root@ip-172-31-7-169 ~]# hostname
ip-172-31-7-169
After you check all three boxes, it is time to setup the three 1TB drives we identified earlier for each node. The following is the play-by-play steps called out in the To make a volume available steps from the Add a Volume to Your Instance help page.
[root@ip-172-31-7-169 ~]# df -h
Filesystem      Size  Used Avail Use% Mounted on
/dev/xvda1      7.9G  797M  6.7G  11% /
tmpfs            15G     0   15G   0% /dev/shm
[root@ip-172-31-7-169 ~]# lsblk
NAME    MAJ:MIN RM SIZE RO TYPE MOUNTPOINT
xvda    202:0    0   8G  0 disk
└─xvda1 202:1    0   8G  0 part /
xvdd    202:48   0   1T  0 disk
xvdc    202:32   0   1T  0 disk
xvdb    202:16   0   1T  0 disk
[root@ip-172-31-7-169 ~]# mkfs -t ext4 /dev/xvdb
[root@ip-172-31-7-169 ~]# mkfs -t ext4 /dev/xvdc
[root@ip-172-31-7-169 ~]# mkfs -t ext4 /dev/xvdd
[root@ip-172-31-7-169 ~]# mkdir /grid
[root@ip-172-31-7-169 ~]# mkdir /grid/1
[root@ip-172-31-7-169 ~]# mkdir /grid/2
[root@ip-172-31-7-169 ~]# mkdir /grid/3
[root@ip-172-31-7-169 ~]# mount /dev/xvdb /grid/1
[root@ip-172-31-7-169 ~]# mount /dev/xvdc /grid/2
[root@ip-172-31-7-169 ~]# mount /dev/xvdd /grid/3
[root@ip-172-31-7-169 ~]# df -h
Filesystem      Size  Used Avail Use% Mounted on
/dev/xvda1      7.9G  797M  6.7G  11% /
tmpfs            15G     0   15G   0% /dev/shm
/dev/xvdb      1008G  200M  957G   1% /grid/1
/dev/xvdc      1008G  200M  957G   1% /grid/2
/dev/xvdd      1008G  200M  957G   1% /grid/3
Then Step 7 from the Making an Amazon EBS Volume Available for Use tells you how to correctly edit the /etc/fstab file so these file systems will be mounted at boot time. The following shows the format of what the three additional rows added to the end of the file look like.
 [root@ip-172-31-7-169 ~]# cat /etc/fstab | grep grid
/dev/xvdb        /grid/1            ext4    defaults,nofail 0 2
/dev/xvdc        /grid/2            ext4    defaults,nofail 0 2
/dev/xvdd        /grid/3            ext4    defaults,nofail 0 2
Do all of these file system activities to all three hosts. Once done, issue a shutdown -r now on all nodes and then SSH to them when they have restarted and make sure the df -h output shows all three of the /grid file systems being mounted.
We're just about ready to start installing HDP itself, but we need to think about the hostnames and their IP resolutions. We get new IP addresses after we shut these VMs down. In fact, we even get a new hostname as the private IP address is baked into it. Fear not, we can use the instructions at Changing the Hostname of Your Linux Instance to call our boxes ec2node1.hdp22, ec2node2.hdp22 and ec2node3.hdp22. The following, taken from the "... without a public DNS name" of that last link, are the commands I ran for the first node; ec2node1.hpd22.
HW10653:Amazon lmartin$ ssh -i ec2test.pem root@52.11.30.44
Warning: Permanently added '52.11.30.44' (RSA) to the list of known hosts.
Last login: Tue Jun 30 04:46:55 2015 from 12.48.56.194
[root@ip-172-31-7-169 ~]# cp /etc/sysconfig/network ~/network.bak
[root@ip-172-31-7-169 ~]# vi /etc/sysconfig/network
[root@ip-172-31-7-169 ~]# diff ~/network.bak /etc/sysconfig/network
2c2
< HOSTNAME=localhost.localdomain
---
> HOSTNAME=ec2node1.hdp22
[root@ip-172-31-7-169 ~]# cp /etc/hosts ~/hosts.bak
[root@ip-172-31-7-169 ~]# vi /etc/hosts
[root@ip-172-31-7-169 ~]# diff ~/hosts.bak /etc/hosts
1c1
< 127.0.0.1   localhost localhost.localdomain localhost4 localhost4.localdomain4
---
> 127.0.0.1   ec2node1.hdp22 ec2node1 localhost localhost.localdomain localhost4 localhost4.localdomain4
[root@ip-172-31-7-169 ~]# reboot
Verify this FQDN is returned with, and without, the -f switch.
HW10653:Amazon lmartin$ ssh -i ec2test.pem root@52.11.30.44
Last login: Wed Jul  1 02:19:08 2015 from 12.48.56.194
[root@ec2node1 ~]# hostname
ec2node1.hdp22
[root@ec2node1 ~]# hostname -f
ec2node1.hdp22
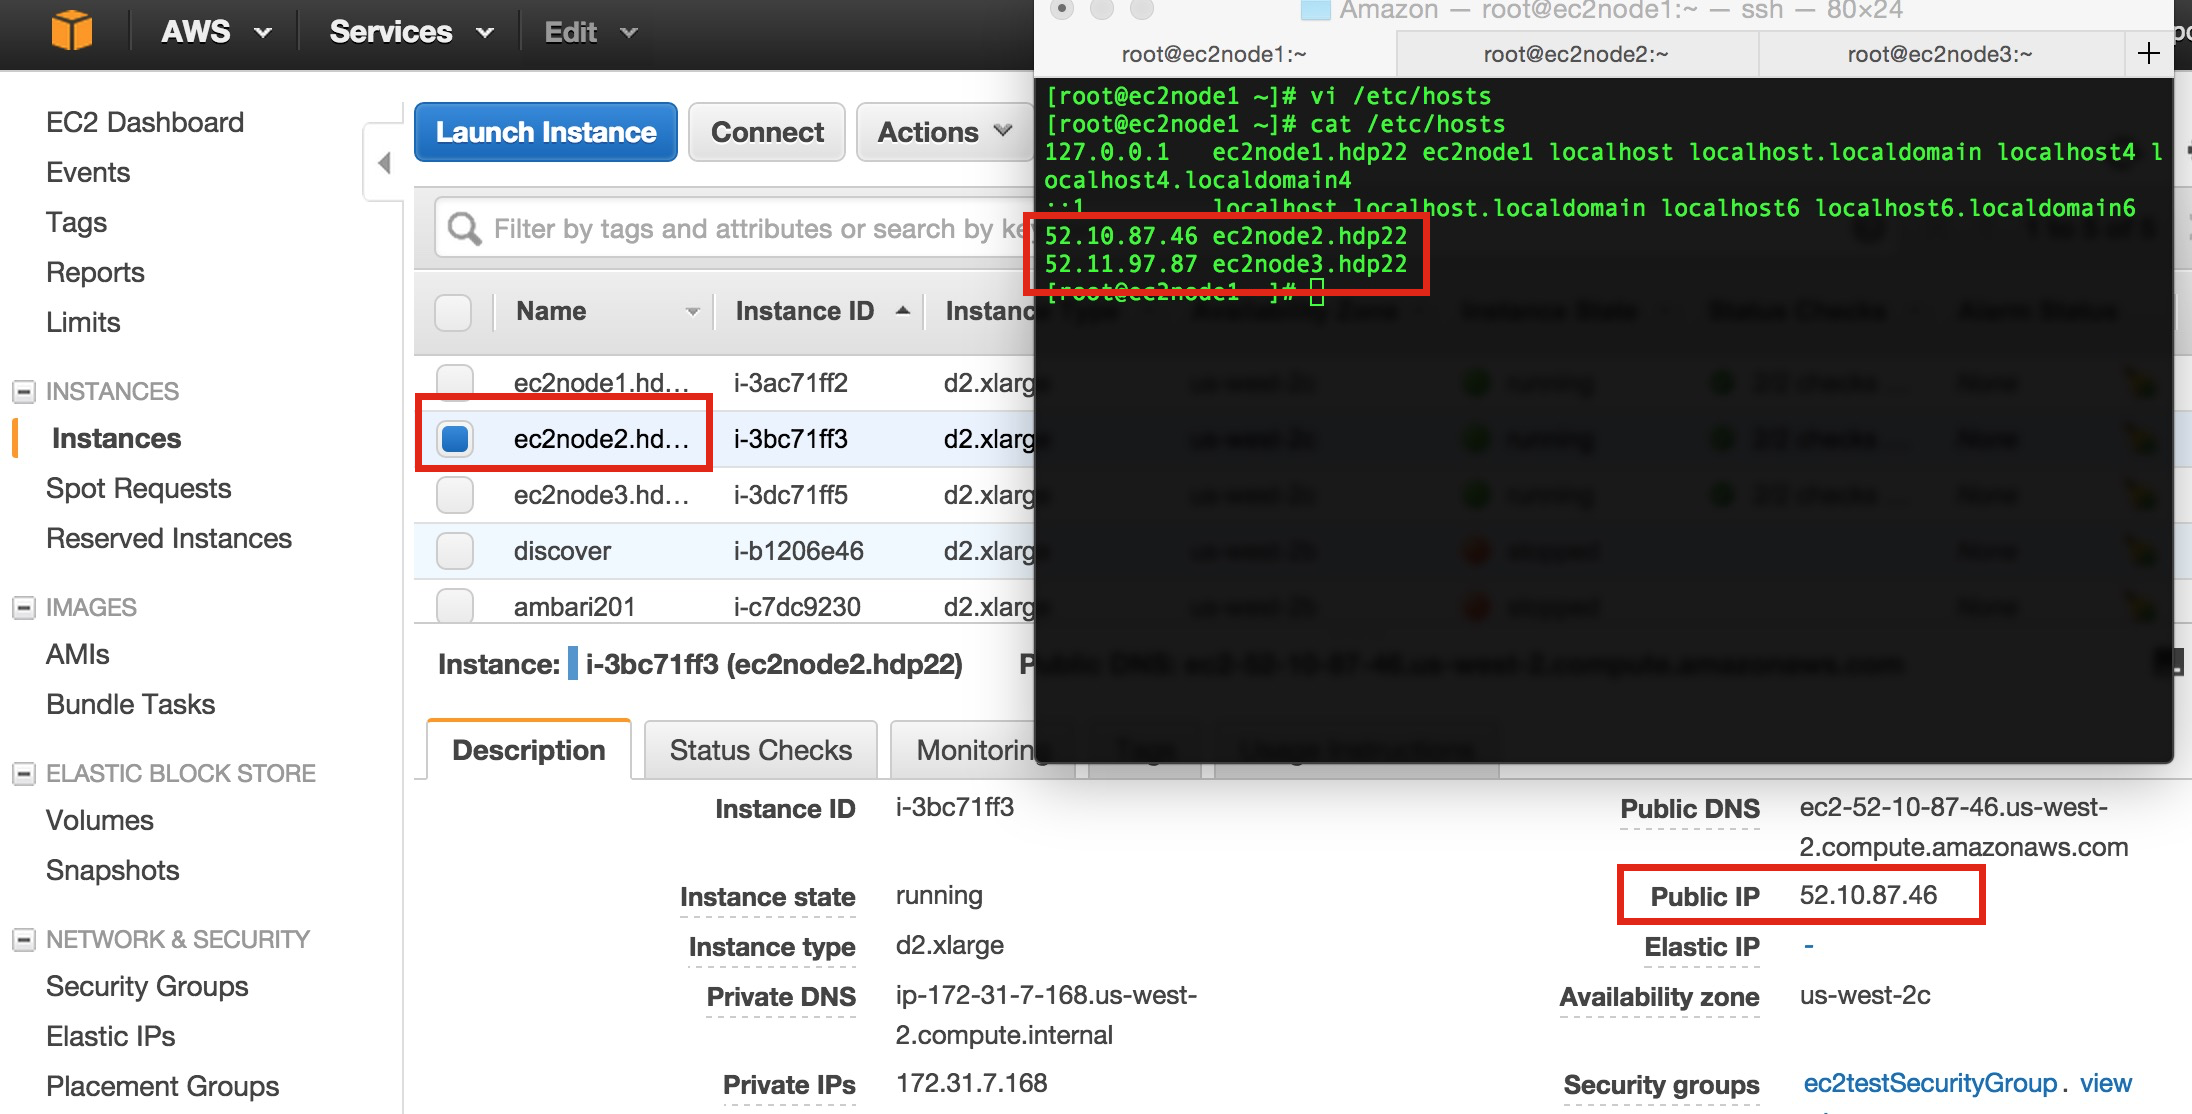
Do this for the other two EC2 instances. Now all boxes know who they are, but they don't know where each other are – well, not with our testing .hdp22 domain! For this, we'll just need to create /etc/hosts entries for the "other two" boxes. As shown below, we will use the public IP addresses as we'll probably want to access something like HiveServer2 or see the Resource Manager UI and this will help. For our testing case, we'll just assume that this provides not overhead compared to using the internal IPs that are available.
If they are all there, now it is time to visit http://docs.hortonworks.com/HDPDocuments/Ambari-2.0.1.0/bk_Installing_HDP_AMB/content/index.html (or the latest version) Ambari install page and start following instructions. I'm not going to use the password-less SSH connectivity, and since I'll need to do something a bit different regarding hostnames, I'll go slightly out of order. The following are the steps I executed on the box I want to run Ambari on; ec2node1.hdp22.
PICK UP ON DOING HTE AMBARI INSTALL!!!